McCalls M7284 Haute Hippie Top

M7284 Back

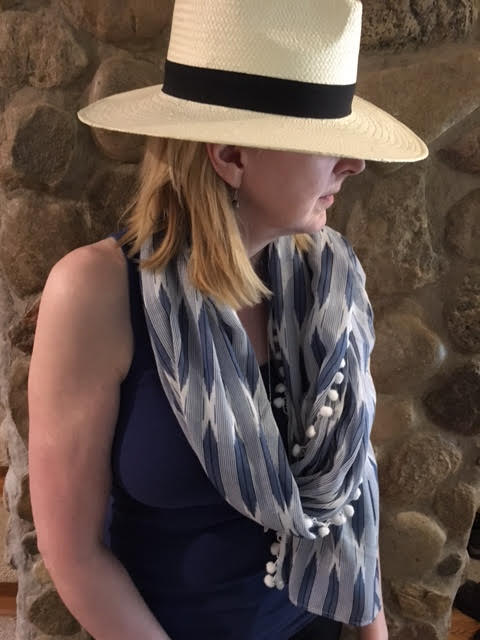
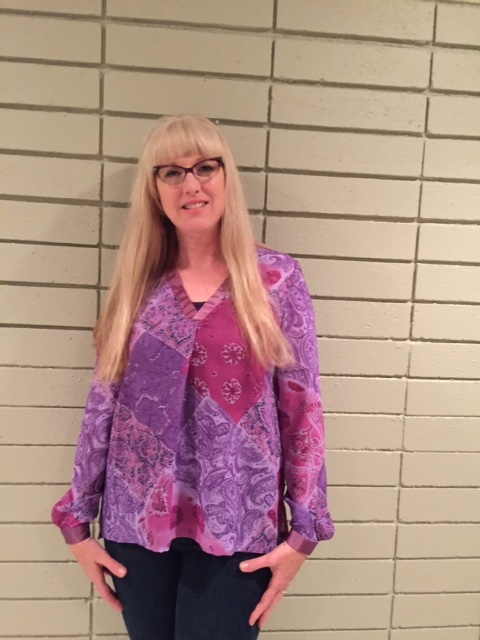
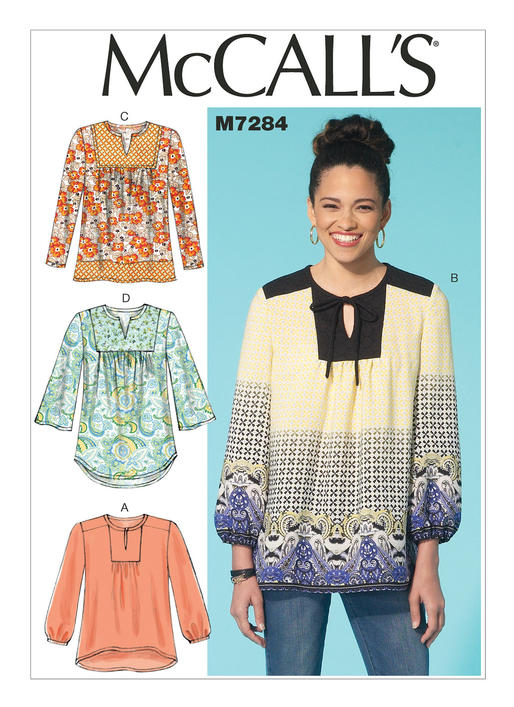
Squinty face!! I made this top to show off some really glorious fabric acquired from Elliot Berman in NYC that I got at PR weekend in June.  It’s a fine rayon border-print panel, and I needed the perfect pattern to show off the gorgeous print.  Enter:

m7284

There are lots of gorgeous versions of this top already:

Lori of Girls in the Garden in a dotty version

Sharon of Stitch Sewing Studio in a mixed print version

Erica B’s white linen version

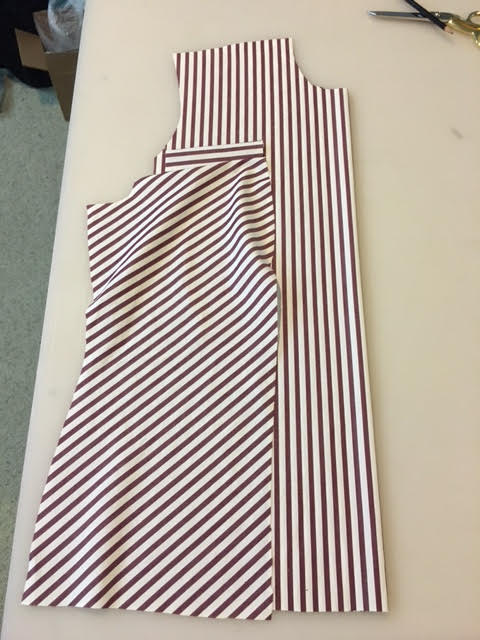
I made version A, but without the high-low hem; the border print was straight across so I cut along the design.  I also created a tiny band of the border and used that on the gathered sleeves instead of making them with elastic.   Other than that, it was a straight up sew.  The yokes are faced with lining fabric instead of being self lined,

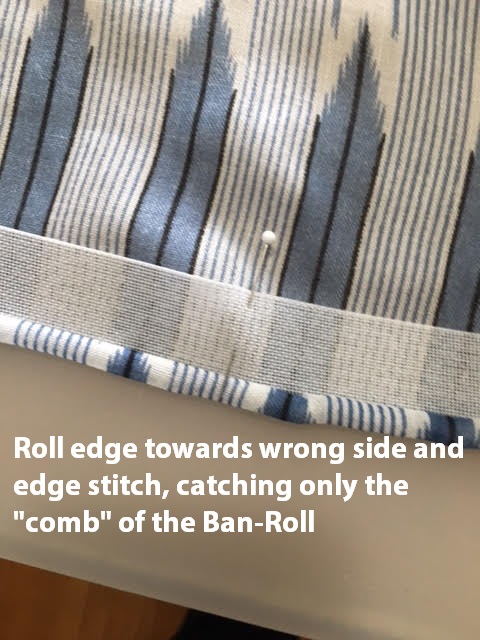
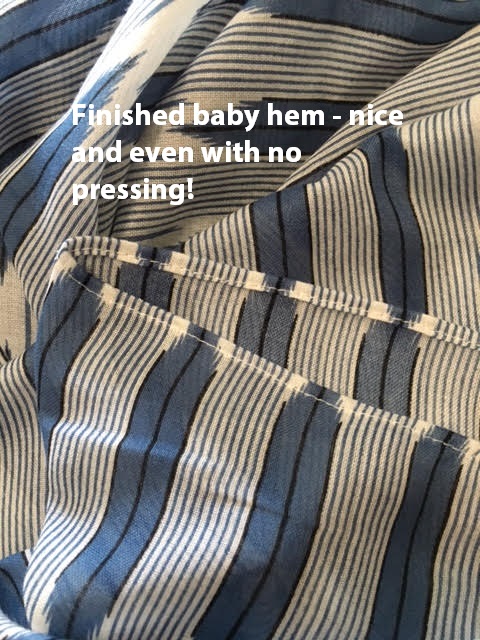
Because the border was not wide enough to use for the neckline inset,  I cut that part with a centre front seam (the print hides the seam) to fit the pattern piece.  I also used my baby hem technique – worked great in this drapey, shifty fabric (which is delicious on!).  The front is closed with a hook and eye.

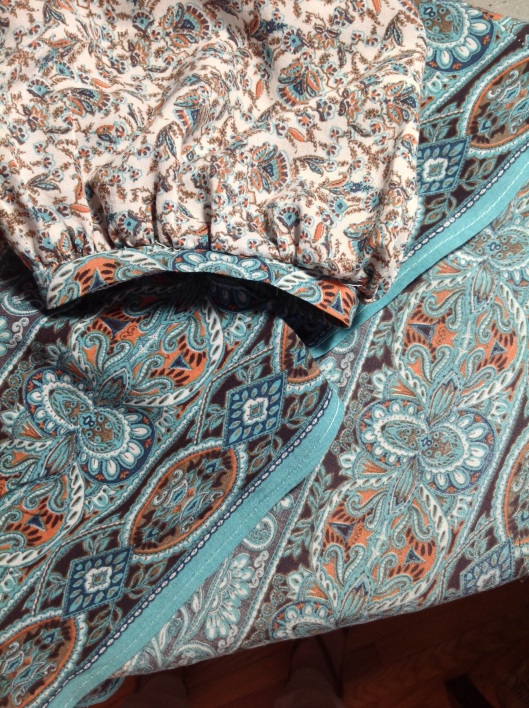
Here’s a detail of the sleeve bands and hem:

M7284 close up

I did not lengthen this at all, I was happy with the way it looked here, which is super unusual!  I see it’s a bit shorter than the model (mine his above the crotch line) but I didn’t want anything too tunic-y (is that a word?)

Here’s the back (the hem is even, it’s just the way I’m standing):

M7284 Front 1 (3)

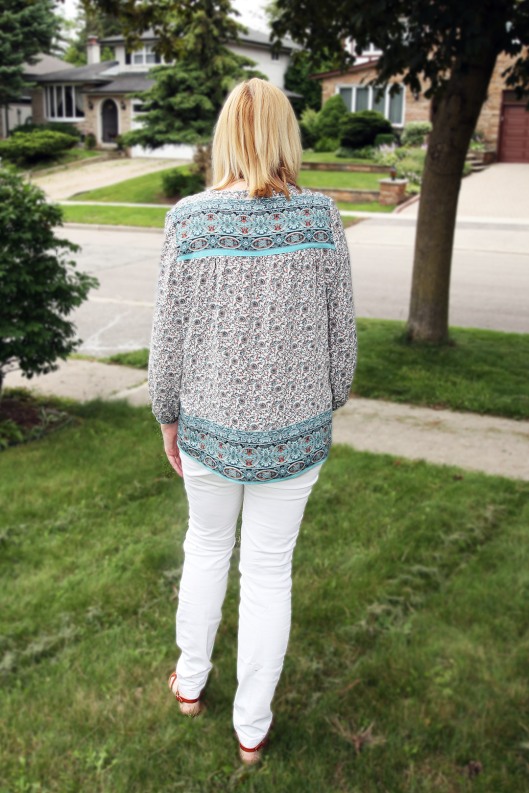
I’m pleased with the way it looks, the fabric was beautiful to cut and sew!

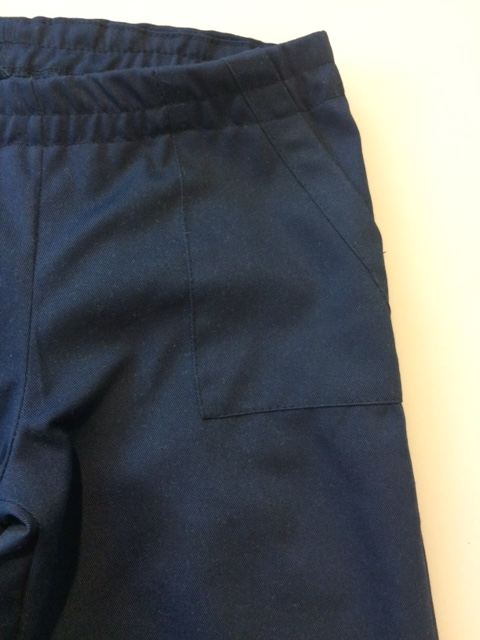
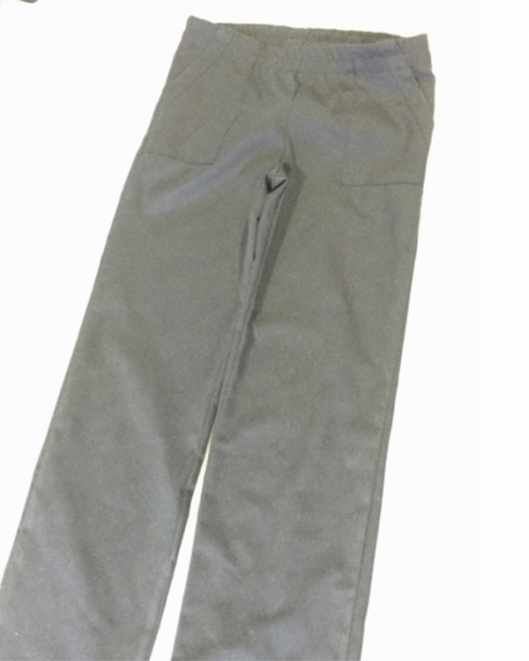
Worn here with Jalie 2908 stretch jeans (skinnified) & faux leather flat sandals


Simplicity 8124 by Cynthia Rowley

Simplicity 8124

Suetop


As you can see, this was a pretty easy make, it’s one of the easier off-the-shoulder patterns out there right now, with only 3 pattern pieces (front, back, sleeves).  I could have easily gone down a size to have the fit a bit more like the envelope photo.

I made mine from a soft navy rayon.  It’s a plain weave, with a fair amount of drape.  I got it in a store that has lots of Indian fabric & they had it in tons of colours.  My guess is it’s for traditional asian garments.  It’s super soft!

This is a great pattern if you want a quick, on-trend sew.  I made it the night before then wore it to a potluck lunch the next day.  I’ve never worn an off the shoulder top before and it behaved pretty well.  I have also read a tip for putting elastic loop under the arms to help keep it in place (which I didn’t do, but would be a great idea.  I lengthened the sleeves about 1″ & made a tunic length.  Overall the look is more voluminous than the pattern envelope, but I think the simple style would suit many ages & figures.  I like the deep hem (although you’ll have to ease it in, which is not suggested in the pattern instructions).

I should also mention I picked this pattern up in San Diego last November at a black Friday sale, I’m not sure why, but for a few years now Simplicity and New Look patterns have not been available in Canada.  I guess it’s a sore spot; when I was at PR weekend the woman from Simplicity Patterns rolled her eyes when I said I was from Canada and said she “didn’t want to go there” (talk about it, not literally NOT go to Canada, who wouldn’t want to go to Canada?) and I didn’t even mention the subject!!

I am wearing it here with white cropped Eleonore jeans from Jalie & a Stella and Dot necklace.


Easy Scarf and a new technique

Scarf

About 2 weeks ago I returned from the fabulous PR weekend in New York.   I enjoyed lots of walking, sightseeing, eating, sewing talk and shopping during my 4 days, and if that wasn’t enough we made a quick stop in New Jersey to a Jo-Anns on the way home.  That’s where I found this great lightweight fabric with attached pom-pom trim.  If you’re looking for it on line, it seems to be called “Earth Child Cotton Feel Apparel Fabric with Pom Pom” it feels like rayon, but the website says it’s polyester.   I bought a scarf length, and hemmed the edges using this great technique!

First, you need to get some ban-rol (I spelled it Ban-roll in my tutorial, but apparently it’s ban-rol) It is a stiff stabilizer with an open weave that comes in different widths.  My local Fabricland won’t carry it anymore after this lot is gone; and they only had a narrower width, but it worked just fine.  Here’s the technique; there are other tutorials on line too.    Prepare a couple of meters/yards, as it’s re-useable.  I got a 5m length.

  1. Prepare the ban-rol:  cut off the tightly woven edge (on mine it was one thread).  Pull threads from the edge so you have a fringe.  Your finished hem will be the depth of your fringe.  I think I ended up with a 5-thread depth in total, but it’s totally up to you.
  2. Line up the ban-roll with your even cut edgeban roll hem 2
  3. Stitch along the ban-rol, catching only the “comb” or fringe of the ban-rol with your stitches.  My stitch length was 3.Ban roll hem 4
  4. Here’s what it looks like after the first pass of stitching from the reverse side:Ban roll hem 3
  5. Flip over the ban roll so the “comb”/fringe is enclosed.  Everything is now rolled to the wrong side of your fabric:Ban roll hem 5
  6. Edgestitch your rolled edge. Go slow so you only sew on the “Comb”/fringe part of the enclosed ban-roll.  When you’re done the ban-rol will pull easily out of the two rows of stitching leaving you with an impressive straight & tiny hem.  With no pressing needed!Ban roll hem finished

Patternreview Sewing Bee Round 2: Bias

bias3

The second challenge (60 of 103 entrants made it to round 2) for the Sewing Bee was to create a garment using bias.  Guidelines were to use bias in an adult garment, show how you used bias in your garment & show the bias grain in your entry submission.

I decided to go vintage all the way!  Bias eats up an enormous amount of fabric, and I wanted to use stash fabric and pattern in this project.  Bias screams vintage to me, so it gave me a good chance to go through my vintage pattern collection and match it with something in my substantial stash.

pattern

So I found this beautiful 1930’s Vogue women’s blouse pattern. It has a single welt chest pocket (for all your boob pocket needs?), a side front inset, and short, cuffed sleeves. I sketched a few variations of stripe blocking until I was happy.  After reading a couple of articles on sewing with bias, I also decided to alter the sleeve to cut it in 2 pieces on the bias creating a chevron seam.  The fabric is  vintage men’s cotton shirting, only 35″ wide.  I cut the side front panel on the bias & I also made the buttonholes on a 45 degree angle.  I think I’m most pleased with the sleeves and buttonholes – these are the nicest buttonholes I’ve ever done, and they were done at 1am!

The pattern is unprinted tissue & instructions look like this:

So I had to trace out the tissue onto more substantial paper to fit and alter it; adding length and some width to the back:

tracing

The construction involved lots of hand sewing, and basting to match the stripes.  Here’s how I matched them – you can see I cut out the pattern on one layer with a stripe marked on the pattern piece.  This particular one is on the bias; you can see the diagonal grainline marked on the pattern.

bias-placement

Here’s the bias side front in place:

wip

Working through a pattern of this vintage was very interesting. The order of construction was surprisingly different; the very first step was to work the bound buttonholes; which are usually sewn last (I sewed my buttonholes last) What looked like an inset front corner was actually lapped seams secured with topstitching. The hem was completed before the garment was sewn together. The instructions are very detailed, yet do still require some advanced skill knowledge (they don’t actually show you how to make a bound buttonhole, they assume you just know how) The details are gorgeous, the long sleeve version has a fitted sleeve with 3 darts at the elbow.

Here are some close ups of the bias work; you can see I cut the sleeve cuff and welt on the cross grain, too:

Overall I’m pleased with how it turned out – it was way more work than I thought it would be, but I especially love the buttonholes.  Now to wait for the judging to see if I make it to round 3!

Simplicity 1318 Kimono


This was a quick and cheap sew!  Fabricland had half price on the clearance section a month or so ago and I picked up some polyester fabrics for about $1.50/m.  I like the idea of a darker print but lightweight garment to transition to fall but work if the weather is still warm – which is pretty typical of Toronto weather.   This stretch poly has a hammered texture and was quite beefy & easy to sew.  Perfect for a kimono jacket.  Sewed it straight out of the envelope in a med/large, view B.

The only glitch was when I caught the back in my serger and sliced up a shoulder.  But it was a clean slit & with a little fusible web and a scrap I have been able to seamlessly mend it.

It’s a little shiny, but I like the print!  Worn here with Jalie Éléonore Pull-On Jeans & a relax fit t-shirt from Old Navy.

Patternreview Sewing Bee 1st Challenge


This may be the most brilliant or silliest idea I’ve had in a long time.  I joined the Patternreview Sewing Bee.  Based on the format of the Great British Sewing Bee, it’s an elimination challenge.  Kudo’s to the judges who had to go through over 100 entries in the first round which was a shorts/capri’s challenge.

For my entry, I based my capri’s on the super expensive ($1500/pair) Vetements jeans.  If you don’t know they were uber popular in the fashion blogosphere a while back, and are made from 2 pair of vintage levis which are taken apart and sewn back together in a funky style.  Two of the defining elements are a staggered raw hemline & removed back pockets.

I used one pair of mens 40 waist jeans to create mine – I can tell you it’s a heck of a lot more work unpicking & resewing jeans than making a new pair from scratch.  Here’s what I did:

  • cut the legs away from the seamline & recut the legs with a pants pattern
  • cut off the waistband
  • picked off the pockets, and used them (sideways) on the front complete with jean topstitching & rivets
  • picked off the ticket pocket and used it on the back complete with the recycled red tab
  • once I did the fitting I felt it needed the back yoke added back on, so I cut it from some denim scraps I had.
  • Inserted a side lapped zip
  • re-attached the waistband with a new closure (jean button/buttonhole)

I made it through to the second round!!


Necessary Sewing

Sara Jalie On Frontjalie pull on pant 2Jalie Pull on pant cropped

My DSD is a tall skinny kid. So was her Mom & Dad (and I was too, but I can’t take credit for her gene pool)  She wears a school uniform and has outgrown all her pants, so I was tasked to make her a few pair.  Thank goodness for Jalie!

The pants above are Jalie 3243, pull on pants and shorts.  I also made her a pair of Eleonore pull on jeans with some leftover 4 way stretch twill, but my fabric store only had non-stretch navy fabric.  The problem with most pull-on pants for kids is they are cut very generously with too much ease & often a high rise, so they look Becky-homecky.  Jalie to the rescue!  I find most of the Jalie patterns I’ve tried fit slim.  They also give a very RTW look.  These pants were no exception!  They are a slim fitting pull on pant (or short) with a medium rise & straight leg.  For a picky 11 year old they are great!  Not too wide (or floppy) and the waistline is not too gathered.  I made a size K (6) waist with a size Q (13) length.

The pants have some variations included, the pockets have a facing which can be sewn inside or outside the pocket (and used in contrast, too).  Above you can see the pocket with the facing sewn on the outside.  As well, the waistband can be sewn outside or inside, mine had the waistband applied as a facing & sewn to the inside.  I used 1″ elastic sewn through the centre as per the instructions.

As with all Jalie patterns, the drafting and instructions are excellent.  The only thing I would check is the pocket size; its on the smallish side; and as you can see on the top the facing is topstitched through the top of the pocket.  If you have larger hands it might make the pocket opening a bit small.  It fits DSD fine, though!

Here is a sneek peak of another recent project on my cute sister:

McCalls Tunic on Glynis


A litte fabric shopping in Quebec

fabric.png

Each year in February, DH and I go skiing in Quebec, at Mt. Saint Anne, which is about 45 minutes east of Quebec City.  We rent a townhome at the bottom of the mountain (which is about 2000 ft. of elevation) with some friends – mostly these are friends we play volleyball with in a league; so often, as was this year, it’s all guys and me!  We go from Sunday – Friday and ski 4 days…in between we relax, cook, play cards and watch movies.  This year the mountain was closed one day due to inclement weather – which is very unusual!  So DH asked if I wanted to go fabric shopping in Quebec City.  A few years ago we went to a small, family run Tissus Claudiany; this year after visiting Club Tissus in Montreal last summer with Connie, Kay and Anne Marie, I decided to check out the Quebec City store.

On the way home we dropped in, as it’s just off the highway.  The store in Montreal was about twice the size, however this store still had a very nice selection of fabrics and more.  I especially like fabrics from Telio Fabrics – a Montreal distributor.  Once in a while Fabricland in Toronto will have some (my Burda T with the exposed back zipper is one of their fabrics) but Club Tissus has an amazing selection!

As well, they stock sewing machines, sergers, gravity feed irons, books, patterns, magazines and lots of specialty fabric and trims.  They always have Jalie patterns, too!!  They have a club card which gives you a discount, and each bolt has a regular price & club price, which is usually a few dollars less per metre.  Staff speak mainly French.

Above is my ‘haul’ – from top left; clockwise:

  • 2m rayon digital print in a silky lawn weight with a gorgeous hand and drape $12.99/m
  • 3/4″ knit elastic in black and white (this is great because unlike other elastics it does not get narrower when it’s stretched – for some reason Fabricland here doesn’t stock it much) .39/m
  • 1m printed mesh; for sleeves for a mixed-media t perhaps… $4/m on sale
  • 1m geometric design laser-cut pleather; it’s pretty wide…maybe for a skirt or insert/border….not sure but it was just so freakin cool I had to get it.  $24.99/m

I also have done some sewing in February, unfortunately my latest project was packed up and sent to my sister for a birthday present before I could remember to take some pics.  It was a tunic top (McCalls 7248, view D) in a purple patchwork poly georgette print with satin cuffs and neckline:


m72481

For anyone sewing this, I found the high-low hem was not as pronounced as the illustration indicates.  I liked the pattern, it was pretty easy to sew.  I always find this type of neckline fiddly; in this one they have you insert the collar bands into the pleat at the bottom front.  Placket necklines get me too, I always find it difficult to get the plackets to overlap exactly and line up perfectly with the clipped corners at the bottom of the garment.   Maybe I should cut the slit after I have the neckline sewn?   Not sure how to fix that issue….I will make it again with an easier to sew fabric next time which should help with that problem.


McCalls 6796 Split-Collar Top

Purple McCalls.jpg

This was an interesting experience! I use a lot of PDF patterns, especially because shipping to Toronto can be expensive.  But, until now most of the PDF patterns I have used have been from independent or smaller pattern companies.  This is the first one I’ve bought from the big 4, which was a bit of a method than the usual.  I only purchased it this way because while it seemed to be in the catalogue on-line it was not available in my local fabric store so it must have just gone out of pint.

But I noticed a ‘Buy downloadable pattern’ button next to the pattern illustration!  So I ordered the pattern & then instead of the usual link to a PDF, I had to download some software called “Print Sew” which gave me a link to the PDF, which was easy to print.  The pattern instructions are tiled, so you need to print about 6 pages and tape them together.  I didn’t need to print out the cutting directions as I rarely use them.

Anyway the top is a very straightforward sew, it’s a basic t but I liked the look of the split collar neckline with the button trim & I thought it would make a cosy winter top.

The only thing I did differently, because my sweater knit was kind of floppy, was to use some lightweight knit interfacing on the ends of the collar so it would support the buttons.  I was afraid to interface the entire collar as I thought it might make it too stiff/thick, but in retrospect it probably would have been OK.

Here’s a close-up of the pretty buttons, and you can see the lovely marled clear purple colour of the fabric:

Purple Buttons

As with the big 4, it was a bit oversized, so after it was put together I took in the waist about 1/2″ for a more fitted look.  Other than my standard lengthening of 2″ for the arms and 1″ in the body, this was sewn as a standard size 16.

The hems were sewn with a double needle…because the fabric had a tendency to run I folded the raw edge in 1/4″ before turning it up to hem.


New Year, New Post

As with all things, life and job really took a lot of my time in 2015; I devoted all of my spare time to sewing, but certainly didn’t post a lot!

This year hopefully will be a bit better, with some very loose sewing goals to post more, post on instagram and sew more from my extensive collection of Burda Style; which has been a birthday present from my husband for many years now!

This first project of the New Year is from January 2016; a blouse in the plus section, 132A.  Here is the photo from the magazine; I really loved the fabric and the way it was used as a border print.  Unfortunately I couldn’t find the fabric on line, but surprisingly I did find a close match at Fabricland!

Burda 132A magazine

Description from Burda: “This hip-length blouse features 3/4 sleeves with slits and a fun printed fabric. Pair with slim trousers for your morning commute to work!”

My version, in a similar print (an interlock jersey; not a woven) with decorative exposed zipper:

The fabric does not have as much ombre effect as the original, but if I find a nice border print I may try and sew it again for spring.  The fabric is printed with a very muted pearlized metallic finish.  If you look closely, the back has a semi-circular inset on the top.  I interfaced it with Pro-Weft Supreme medium weight fusible interfacing from Fashion Sewing Supply.  Pam has absolutely the best interfacing around, I highly recommend it!  The zipper is topstitched down and doesn’t open, it’s merely decorative.

I sewed this top like a blouse (the pattern is for wovens) instead of a knit.  So I included the darts and set the sleeves in by hand; the only thing omitted was the neckline facings.  I hemmed the sleeves, neck and hemline with a twin needle; I took my time pressing the curved hems before sewing them; this fabric held a crease really well.   It went together well, but I really didn’t look at the instructions so I can’t tell you whether they are in the usual crazy Burda style.

All in all, happy with the result!

My next plans are a mini-capsule with:

  • grey culottes (Butterick B6178) – what’s up with Butterick lately?  I have bought more Butterick patterns lately than in the last few years!
  • purple sweater knit split-neck top (McCalls M6796)
  • cocoon jacket in black/white/silver marled sweater knit (Style Arc Violet Knit Jacket)
  • black pull on pants  (Style Arc Barb or Flatbottom Flo)

Happy 2016 & here’s hoping you achieve all your sewing goals!